The Arduino site has a decent walkthrough, but I found some of the steps to be confusing or outdated. Hopefully, this will get you up and running quickly.
Contents |
Overview
Most of this setup will have to happen once, then starting new projects is typically as easy as duplicating a simple, skeleton project. Getting the paths and configuration options correct for this initial project was the most confusing for me, but I haven’t needed to tinker with them again.
To begin, download Eclipse for C/C++ Developers, or install the C/C++ plugin for your existing Eclipse version (these instructions assume Eclipse 3.5 Galileo). To install an Eclipse plugin:
 Open Eclipse. Navigate to Help > Install New Software…

 Select CDT from the drop down menu. If CDT is not present, then click the add button and paste the link to the plugin update site in the Location field: http://download.eclipse.org/tools/cdt/releases/galileo
- Select Eclipse C/C++ Development Tools, then click “Next >” and “Finish” on the following screen. This may prompt you to restart Eclipse, however select No so we can install the next plugin.

- Return to the Install New Software dialog. Paste in the location for the AVR Plugin and select it and click Next to install. You may have to agree to license terms. http://avr-eclipse.sourceforge.net/updatesite/
 AVR tools. You should install tools appropriate for your platform:

Setup Eclipse

After the plugins have been installed they need to be configured. Specifically, the paths to the AVR Tools need to be verified.
- Open the Eclipse Preferences: Eclipse > Preferences. Twirl down the AVR category and select “Paths”. Verify that the paths have located the correct AVR toolkit (CrossPack-AVE on OS X). You can edit these fields as necessary.
 Select the AVRDude category. I’ve found that I need to add a Programmer configuration for each Arduino (or USB to Serial adapter) that I use. Please let me know if you can get a better solution working with wildcards.
- Give this configuration a descriptive name. I’m using “Arduino Diecimila”.
- Select “Arduino” as the Programmer Hardware
- Enter the correct port for your Arduino. You can display this by plugging the Arduino into the computer, opening the Terminal then typing: /dev/tty.usbserial then hitting the Tab key. The remainder of the port name should appear.
- Set the baud rate to 19200
- Click OK. Then close the preferences.

Create an Arduino project
For the first project you’ll need to manually set up the configuration. I’d *highly* recommend making a basic blink sketch, then duplicate it for each new project. This is what the tutorial will set up. Alternatively, you can try importing this basic project, but may have to set up the paths for your system anyway. Eclipse Blink Sketch
- Go to File -> New -> C Project
- Select Empty Project under AVR Cross Target Application and name the project “Hello_Blink”.
- Click Finish.
- Select the “Hello_Blink” project in the Project Explorer panel, then navigate to Project > Properties menu.
- Twirl down the AVR category and select AVRDude.
- Select your Arduino from the Programmer configuration menu
- Select Target Hardware at left.
- Ensure that your Arduino is plugged into your computer via USB (and is powered on).
- Click “Load from MCU”. This should query the Arduino for it’s type and detect it correctly.
- If this doesn’t work, typically the Diecimila is an ATmega168 while the Duemilanove is an ATmega328
Each Ardiuno project needs to include the Ardunio core library. This file is compiled automatically by the Arduino IDE. While you could compile it yourself in Eclipse, the easiest way to get it is to build a simple sketch in the Arduino IDE, then copy the “core.a” file into your Eclipse project.
 Start the Arduino IDE
- Open the Blink sketch (File > Examples > Digital > Blink)
- Click the “Verify” button to compile the sketch
- Select Sketch > Show Sketch Folder
- Drag core.a into your Eclipse Hello_Blink project to copy it in.
- Right-click on core.a, select Rename and change it to “libcore.a”

Now we set up the correct building settings:
- Twirl down C/C++ Build and select Settings
- Select “Additional Tools in Toolchain”
- Check the following:
- Generate HEX for Flash Memory
- Print Size
- AVRDude
- Uncheck Generate Extended Listing
- Select AVR Compiler
- Change the command from avr-gcc to avr-g++
 Select AVR Compiler > Directories
- Add an Include Path to the header files within the Arduino.app bundle (look at the screenshot)
- You can right-click on Arduino.app and select Show Package Contents, then navigate to the Contents/Resources/Java/hardware/cores/arduino folder

- Select AVR Compiler > Debugging
- Set “Generate Debugging info” to “No debugging info”
- Select AVR Compiler
- Set the Optimization level to Size Optimizations
- Select AVR Assembler > Debugging
- Set “Generate Debugging info” to “No debugging info”
 Select AVR C Linker > Libraries
- Add a library named “core”
- Add a library path. If libcore.a is in the Hello_Blink project folder, the path will be “${workspace_loc:/Hello_Blink}”

Add a new main.c source file
This file will contain your typical Arduino sketch code. There are additional bits of code that are typically added automatically by the Arduino IDE which need to be explicitly written in Eclipse. Feel free to copy the below code.
- Go to File > New… > C Source File. Name this file main.c
- Paste in the following for a basic blink sketch:
#include "WProgram.h"

// prototypes
void blink(int n, int d);

// variables
int ledPin = 13; // LED connected to digital pin 13

void setup(){
Serial.begin(9600);	// opens serial port, sets data rate to 9600 bps
pinMode(ledPin, OUTPUT);      // sets the digital pin as output
Serial.println("------------------");
Serial.println("   hello world");
Serial.println("------------------");
}

void loop(){

  blink(3, 50); // blink led (n times, ms interval)
  delay(1000); // wait 1 sec
}

void blink(int n, int d){
  for (int i=0; i<n; i++) {
    digitalWrite(ledPin, HIGH);
    delay(d/2);
    digitalWrite(ledPin, LOW);
    delay(d/2);
  }
}

int main(void)
{
init();

setup();

for (;;)
loop();

return 0;
}
Building
When you’re ready to build and upload to the Arduino, click the Hammer icon. This should compile your program and then run avrdude, which uploads to the Arduino.
New projects
Duplicating a project in Eclipse is as simple as selecting the source project in the Project Explorer panel, copying it (Edit > Copy) then paste. Eclipse will prompt you for a new name , then will create a new, duplicate project in the workspace.
If you keep the blink sketch intact, you should be able to duplicate it each time and avoid the above setup.
Follow up

You should be all set to work on Arduino projects in Eclipse. Note that Eclipse uses various “perspectives” for different modes and programming languages. Typically, you’ll be working in the C/C++ perspective while working on Arduino code. If you’d like to switch back to the Java perspective for working with Processing, select it from the perspectives at the upper right of the main window, or Navigate to Window > Open Perspective > Other…
]]> For the 1-in-1 Project as part of ITP’s 30th anniversary celebration I over-engineering the simple bicycle blinky light. Why go for a simple, off-the-shelf blinky light when we can build a much more complicated one ourselves?!
I’m creating an animated display, which changes to solid red while braking.
Update: (5:26) It’s been a long night, but it all came together. I wish I could have finished at the floor, but sometimes you need to go to your cave. The bike blinky light is all I could have asked for…it’s obnoxious, it’s animated, it has a handlebar control to switch to a flashing warning mode.
Context:
 I got a package of several 5×8 LED matrix displays early in my first semester on clearance from an online electronics wholesaler. I’ve had aspirations to work them into a project ever since but never got around to it.
Several months ago my bicycle taillight stopped working. I took it apart and found a bad solder joint at the LED, so I fixed it and it was happy for several more weeks before acting up again. Now, I’m betting that it’s just a dead battery, but those coin cells can be expensive!
A (more) reasonable person would just get new batteries…performing an effective mental calculation between cost and safety. I say that’s a fool’s errand! Just build a new one, with a rechargeable lithium battery…and while you’re at it upgrade from one LED to 40!
 I suppose this is from the “because we can” category. Next steps are to build a weatherproof housing, quick-release mounting, serial control for updating the animation and maybe generative graphics or bluetooth…real-time Twitter feed anyone?
Check out the other ITP30 1-in-1 projects.
]]> (note: I’m awaiting the HR sensor, this is mostly outward forces)
I’m logging the acceleration forces at the handlebars of my bicycle while riding through New York City. The body has roughly three contact points with a bicycle, the hands at the handlebars, the “seat” at the saddle, and the feet at the pedals. The downward force of the rider’s weight and pedaling force and the upward forces of the bicycle rolling over uneven ground are distributed over these three points. I was interested to see just what kind of forces are “pushing back” that I may not be aware of, myself lost in the act of simply keeping the bicycle upright and safely navigating through traffic.
 To contextualize the raw accelerometer data I also tracking GPS location and eventually geocoding the raw data in software. The bicycle sensors are being transmitted via Bluetooth to a mobile phone and the data is logged with a custom written (but now open-source!) python script. Below is the first draft of the visualization.
I intend to add more sensors to record internal forces to see if there is a physiological response (HR, GSR, breathing, pressure on contact points) to external factors such as speed, traffic / road / weather conditions, time-of-day etc.
Video demonstration of the initial visualization.
]]>This is just a teaser for a project I’ve recently begun, but I had an “a-ha” moment when the visualization program finally came together just now and wanted to share…
This is geocoded accelerometer data from the handlebars of my bicycle on my commute from Greenpoint to ITP in the East Village. The sample at middle of the graph, and the red circle on the path coincide. I realized just now that this is a seam in the Williamsburg Bridge. Neat.
I’ll post proper documentation of the project as it becomes more robust…but I’m excited. Waiting for the heart rate monitor interface to arrive…looking to couple internal status with external events…
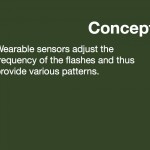
]]>BlindSight aims to explore synesthesia by associating certain body positions with visual hallucinations induced by photic stimulation. In other words, flashing lights at various frequencies seems to cause visual patterns to appear for the viewer. Simple wearable sensors adjust the frequency of the flashes and thus provide various patterns.


 ]]>
]]> This project aims to explore synesthesia by associating certain body positions with visual hallucinations induced by photic stimulation. In other words, flashing lights at various frequencies seems to cause visual patterns to appear for the viewer. Simple wearable sensors will adjust the frequency of the flashes and thus provide various patterns. Although the patterns may differ for each viewer, they seem to be the same for the viewer at a given frequency.
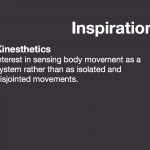
Much of this project stems from two separate influences. First, William Gibson’s “Neuromancer” where he depicts the protagonist using electrodes/glasses to jack into cyberspace, which is depicted as a three-dimensional space largely visualized as colored geometric shapes. Secondly, my general jealousy of individuals whom describe themselves as synesthetes, those who experience certain senses crossing over, ie. seeing certain letters as colored or hearing certain visual motion.
An article in the journal Cortex (#44, May 2008, Dominic H. ffytche), describes a study which employed flashing goggles to induce visual hallucinations for the purpose of analyzing brain activity with MRI. The study indicates that flashing frequencies between 5-30Hz at a certain intensity caused participants to describe perceiving hallucinations (Purkinje patterns) and produced a measurable change in the brain activity.
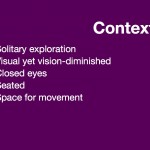
I’d like to use this visual stimulation to represent a small portion of our sense of proprioception. The ideal scenario would be to enable a user to generate an association between certain Purkinje patterns and the orientation of the body relative to itself. I’m working closely with Andrew Styer on the input devices and we’ve been discussing the best sensing for our end. Trying to visualize all of proprioception in this manner would be arrogant at best, so for this prototype we are looking to limit our focus to the upper body, possibly the arms alone.
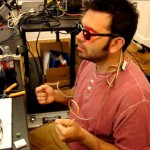
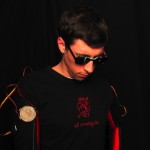
Initial user testing of the glasses have provided strong reactions and most participants report perceiving patterns which change in response to frequency shift. Participants generally indicate that the experience is pleasant, however the prototype glasses may provide too much illumination intensity, overpowering the effect.

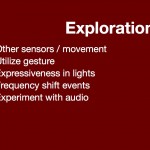
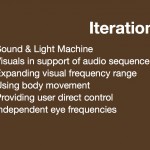
Next steps are to experiment with various sensors / inputs and to determine the levels of discernible patterns within the available frequency range. Another direction for exploration is the event as frequencies change. Several participants have expressed strong reactions when the patterns initially change. Perhaps alternating between frequencies could provide another dimension to the expressiveness of the glasses.
I was first introduced to this visual effect by Mitch Altman’s Sound and Light Machine (aka. the Brainwave Glasses) as described in Make zine. My first electronics kit was hacking Adafruit’s MiniPOV kit to make the glasses. ]]> Alex and I have been developing the plans for the blocks in preparation for building the prototypes in the next week. For this, I built the community edition of QCad (open source FTW!) and have been teaching myself how to draw with it. There was a bit of a learning curve to the interface and the modal model of the application tools, but I’m now relatively comfortable with the basics.
Alex made several physical models of the blocks in styrofoam, which determined that 67mm is the most desirable size for the cubes. After casting a test, hollow cube of silicone, we decided that given the pliability of the material we’d need at least 15mm thick walls. Using these measurements I started sketching out the components as the might be assembled inside the form.
Currently, we plan to have the blocks respond the their orientation as children hold them. The blocks will change colors and vary the color pulsing rate as they are tumbled. Shaking a block will cause it to “call out” to other nearby blocks using IR communication. We’re still determining the effective function of the talking, but we’re thinking of having the colors or pulse rate transfer to the listening blocks. Each block that receives a message will relay it in turn, hopefully contributing to a “bucket brigade” or domino effect.
We’re looking to use the ATmega168 chip for the prototypes as they are cheap and we’re comfortable using them – having come from an Arduino background. Of course, with the timing necessary for the IR encoding and decoding, plus the color variations needed for the RGB LED, we’ve had to dive into the C code and use the mega168’s interrupts directly.
Using these sketches I’ll lay out a circuit that we can prototype on a perf board or even etch some sample boards. We’re still working out the power supply…but I think that getting the user experience right for this first version trumps the practicality goals at this point.


Corey Menscher and I worked together on ThinkBig for the Whole Body Interface exercise in Thinking Physically. Corey had the basic idea of making soft switches which would be foot activated. Initially he was going to make three which you’d have to skip between.
We had a discussion about other implementations of the idea, including a hopscotch-type arrangement but ended up riffing off the large keyboard depicted at FAO Schwartz in the movie Big. To this end we made 8 switches which would be mapped to notes on a musical scale. After more discussion we decided to allow the switches to be arbitrarily positioned, including on walls, and the actions would trigger sound samples rather than notes.
 Building the soft switches was easy enough – two layers of conductive fabric with a layer of dense foam between them. We wanted to put them on flexible surfaces, but for the prototype affixed each to a small wooden block.
The class seemed to enjoy using them, especially when they were on the wall rather than the floor. The scale of the interface encouraged multiple simultaneous users to play, and the distance between each switch introduced a natural limit to how quickly you could move from one switch to the next. As with the Brauswitch the output was simple sound samples, but it would be interesting to experiment with other actions.
Video of the class trying it out below. Enjoy.
]]>I made a few (simple in hindsight) changes to the project which has worked well for me so far.
Bill of Materials
- Xcode – provided with the Apple Developer Tools
- Arduino IDE – needed for the core libraries for programming the Arduino
- AVR programming tools. Easiest solution is to install the AVRMacPack.
- You can alternatively install avr-gcc, avr-libc, avrdude and libusb via MacPorts or Fink.
- Project Template for Arduino on Xcode.
- For reference: Original source of the ArduinoXcode project template.
Set-up
- Install Xcode. Typically at /Developer
- Install Arduino. Typically at /Applications/arduino-x.xx
Update: Arduino 017+ on OS X is now provided as an application bundle. See below. - Install AVRMacPack. The tools are located at /usr/local/AVRMacPack
- Uncompress the ArduinoOnXcode project template. Move it to /Developer/Library/Xcode/Project Templates/Other/
- Open the Makefile in the ArduinoOnXcode folder. Edit the ARDUINO and AVRDUDE_DIR lines to reflect your system. The default values should work “as is” with this tutorial. Note: for Arduino 017+ change the ARDUINO path to:
/Applications/Arduino.app/Contents/Resources/Java/hardware/cores/arduino
Use
Create a new project in Xcode and select Other>ArduinoOnXcode. You’ll be prompted for a save location for the new project. Select a location and name and click “Save”.
The code for your sketch is written in “main.cpp”. Any custom functions you write will need to be either prototyped at the top of the file where indicated, or will have to be declared before they are used in setup() or loop(). A prototype just indicates the return value and any arguments a function requires. The blink function returns nothing (void) and expects two integer arguments, which is prototyped as: void blink(int n, int d); Again, look at the example code in the template for guidance.
Compiling/Uploading to Arduino

Connect the Arduino via USB. Change the Active Target to “Upload”. The select Build>Clean All Targets. This will compile the code and upload it to the Arduino. The template contains a simple blink sketch to confirm that the process worked.
Serial Terminal
I recall a neat trick to enable easy access to opening a serial terminal through Xcode, but can’t find it now. In the meantime you can use the Terminal.app to open a serial connection to the Arduino:
- Open /Applications/Utilities/Terminal.app
- The the command prompt in the new terminal window type (without the quote marks),
- “screen /dev/tty.usbserial”
- Hit the Tab key. The rest of the serial port’s name should appear. If it doesn’t, verify that the Arduino is plugged in via serial and is powered on.
- For example, the command for my Arduino looks like: “screen /dev/tty.usbserial-A4001Jdl”
- Press return to execute the screen command. The Arduino will reset and should open the serial port.
- You can type to send characters, but there is no local echo (ie. you won’t see the typed characters)
- To exit and close the serial port
- Press Control-A then ‘k’ to “kill” the window. This just stops the screen program and returns to the command prompt.
Of course, you could use ZTerm instead…
Good luck!
 Following up on the initial post about the brauswitch – the eyebrow activated headband switch. Here is some video with a simple application demonstrating it’s use. There are separate switches for both the left and right sides. The simple Arduino code listed below will indicate if the left, right or both sides have been activated. A Processing sketch reads the serial output of the device and plays a variety of sound samples.
There is something really nice about the amplification of a small facial movement and the larger audio/visual response of the sketch. It’s also nice to interact in a handsfree way. Oh! Fun. Code after the video.
Arduino code:
/* brauswitch
* robert carlsen | robertcarlsen.net
* 2-2008
*
* the brauswitch is a headband mounted switch activated by raising the eyebrows.
* the prototype version is made from burlap with conductive fabric on opposite sides
* of a small gap in the headband just above the eyebrows. raising the eyebrows closes the gap
* which closes the switch. the position of the headband needs to be adjusted carefully for proper
* action - however once situated well the brauswitch works very consistently.
*
* this code sends a byte via serial when the switch is closed:
* 1, 2 or 3 for left, right and both switches respectively
*/

#define LEFT_BROW 8
#define RIGHT_BROW 9
#define LED 3

void setup() {
Serial.begin(9600);

pinMode(LEFT_BROW, INPUT);
pinMode(RIGHT_BROW, INPUT);
pinMode(LED, OUTPUT);

}

void loop(){
int var1 = digitalRead(LEFT_BROW);
int var2 = digitalRead(RIGHT_BROW);

byte msg = 0;

if(var1 == HIGH){
digitalWrite(LED, HIGH);
msg += 1;
delay(10);
digitalWrite(LED, LOW);
}

if(var2 == HIGH){
digitalWrite(LED, HIGH);
msg += 2;
delay(100);
digitalWrite(LED, LOW);
}

if(msg>0)
Serial.print(msg,BYTE);

delay(100);
}
Processing (java) code:
// Project:         brauswitch
// File:             Brauswitch.java
// Created by:         rcarlsen, Feb 21, 2009

// Imports
import processing.core.*;
import ddf.minim.*;
import processing.serial.*;

public class Brauswitch extends PApplet {
Serial myPort;

// holder for the incoming data
byte[] data = new byte[1];

// color array
int[] c = {0x33000000,0x33ff0000,0x3300ff00,0x330000ff};
int cIndex = 0;

int timer;
int timeout = 1000;

Minim minim;
AudioSnippet bothSound,leftSound,rightSound;

public void setup() {
size(500,300);
smooth();
background(0);
noStroke();

//println(Serial.list());
myPort = new Serial(this,Serial.list()[0],9600);

minim = new Minim(this);
bothSound = minim.loadSnippet("beat.wav");
leftSound = minim.loadSnippet("msgstart.wav");
rightSound = minim.loadSnippet("msgend.wav");
}

public void draw() {
// draw a partially transparent rect over the previous frame
fill(0x33000000);
rect(0,0,width,height);

// read the serial data is available
if(myPort.available()>0){
println(myPort.available() + " bytes available");

//only expecting one byte
data = myPort.readBytes();
myPort.clear();
}

// act on the read data. it will be 0,1,2,3
if(data[0]>0){
println("Data read: " + data[0]);
cIndex = data[0];
// clear the data
data[0] = 0;

switch(cIndex){
case 1:
if(!leftSound.isPlaying())
leftSound.loop(0);
break;
case 2:
if(!rightSound.isPlaying())
rightSound.loop(0);
break;
case 3:
if(!bothSound.isPlaying())
bothSound.loop(0);
break;
}

// keep the timer going
timer = millis();
}

// fade out if the brauswitch is open
if(millis() - timer > timeout){
cIndex = 0;
if(bothSound.isLooping())
bothSound.play(); //finish the sound and stop
if(leftSound.isPlaying())
leftSound.pause();
if(rightSound.isPlaying())
rightSound.pause();
timer = millis();
}

// draw the indicator ellipse
fill(c[cIndex]);
ellipseMode(CENTER);
ellipse(this.width/2, this.height/2,200,200);
}

public void stop()
{
// always close Minim audio classes
bothSound.close();
leftSound.close();
rightSound.close();
// always stop Minim before exiting
minim.stop();

super.stop();
}
}
]]>