I’ve worked with the Arduino before, but still enjoy the wonderful moment when an LED blinks to life. I have a lot to learn about building circuits, proper wiring and clean / efficient code structure. A lot of what I do amounts to hacks to get a desired functionality. Of course, this builds complexity which breeds bugs and insecurity. Nevertheless, this is a learning process and I’m getting better with each attempt and iteration.
So, off to creating the switch. I routinely get confused with the proper wiring schematic for a pull-down switch. I keep messing it up; it’s incredibly frustrating that I can remember so much but trip up on such a basic circuit. I looked at the schematic, then wired it incorrectly; then looked at someone else’s and wired it incorrectly again. Finally I got it right, but the code didn’t upload successfully (despite the message to the contrary in the Arduino console) which led me to believe that I still didn’t wire it correctly and started over. Eventually, the firmware uploaded and the wiring was right so it worked.
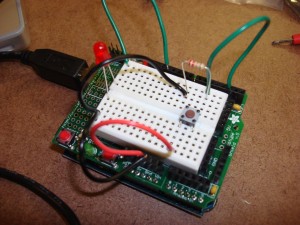
Basic Switch with a pull-down resistor.
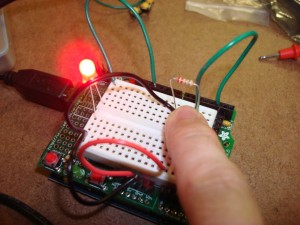
LED illuminated when switch is depressed.
Tom mentioned creating a combination lock…so I took up that challenge. Unfortunately, in hindsight after working through this first version of the project I realize that I ignored his first direction (paraphrased): “Start with the physical reactions rather than the technical details.” So, now I have a four button combination lock that looks like other, commercial devices; what’s unique or interesting about that? How does that expand the human experience?
Regardless, I was able outline a problem and devise the hardware and software to achieve the functionality desired. Namely:
-Multiple buttons
-Arbitrary pattern (hard coded to four presses currently)
-Visual feedback for incorrect code attempt, but only after an entire code has been entered
-Visual feedback for successful unlock
-Relocking with any button press while in an unlocked state
-User entry of a new arbitrary code, but only if in a previously unlocked state
-Visual feedback for the New Code Set state.
-Timeout for partial code entry to return to the initial locked state.
-Packaged in a clean housing. (although the Arduino+prototype shield just BARELY fits in the housing. It’s a bit sloppy)
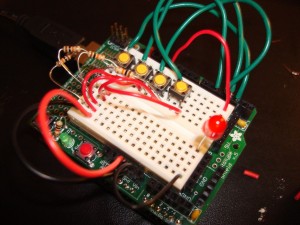
I don’t have a proper breadboard yet, so I did this work on the cramped prototype shield on my Arduino. This doesn’t have the common power and ground rails that larger breadboards have so it made wiring more difficult, and a bit messy. Eventually I got four surface mount switches on there and an LED to indicate the lock status.
After the initial rounds of code testing I felt ready to make a more presentable unit. First change was to swap the switches for something friendlier to touch.
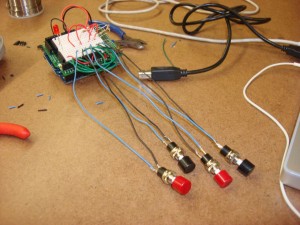
New switches. The leads ended up too long and I had to trim them to fit inside the enclosure.
There was a perfect plastic enclosure on the junk shelf in the pcom lab, which resembled security alarm panels I encountered before. Some quick mockups with marker and a bit of Dremel work later I had the switches all ready to go. I also added an new, recessed switch on the back of the housing for entering a new code.
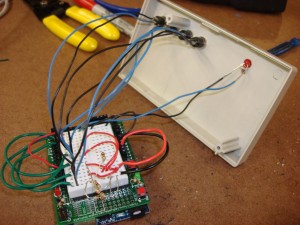
Arduino wired to the switches and unlock LED.
I added a second LED to indicate that the unit is ready to accept a new code. I need to rethink the experience here. The red LED flashes when an incorrect code is entered, and goes solid lit when the correct code is entered. If the unit is already unlocked (red LED is lit) and the reset code button is pressed, the green LED will also turn on (both are on). The next four button presses will become the new code. Pressing the reset button while already in a reset or locked state has no effect. I wonder if users will be confused that the red LED going solid indicates unlock, rather than green. Maybe red solid would indicate locked, green solid would be unlocked and both on would be a reset state. I could still flash the red LED to indicate an incorrect attempt. Hmm…
Here is the “finished” enclosure.
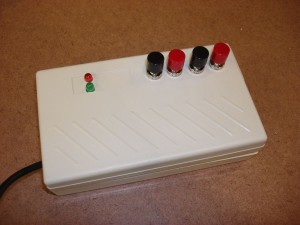
Combination lock v1.0
Arduino code below. I really need to clean it up. I compartmentalized many functions to avoid overlapping code, but my logic is a bit sloppy. I had many issues initially with multiple button presses and switch debouncing. I subsequently added serial output to aid in debugging.
UPDATE: I changed the code to illuminate the red LED when the device is locked, illuminate the green LED when it’s unlocked, and both when in a reset code state. The below code has been updated for this functionality.
#include <SoftwareSerial.h>

// Combination lock
// 3.9.2008 robert carlsen

// have a series of buttons
// press the buttons in the correct sequence - light the LED

// incorrect sequence will flash the LED once and reset, waiting for input

// enable the user to create their own sequence and store it
//*****//

// set up constants for the pinouts
int button0 = 2;
int button1 = 3;
int button2 = 4;
int button3 = 5;

int buttonSet = 6;

int ledUnlock = 11;
int ledLock = 12;

// need to only record once per press, not while it's held down
int firstPress = 1;

// remember the state of the lock
// 0 = locked, 1 = unlocked, 2 = set mode
int lockState = 0;

//timeout
long timeout = 5000;
long lasttime = 0;

//debounce
long debounce = 200;
long lastpress = 0;

// array will store the button sequence
// and set the initial code
// is there a way to store the code across reboots?
int code[4] = {
  button0,button1,button2,button3};

// store the users input
int entry[4];

// use a counter to track the progress of the combination entry
int counter = 0;

void setup(){
  // configure the buttons
  pinMode(button0, INPUT);
  pinMode(button1, INPUT);
  pinMode(button2, INPUT);
  pinMode(button3, INPUT);
  pinMode(buttonSet, INPUT);

  // configure the LEDs
  pinMode(ledUnlock, OUTPUT);
  pinMode(ledLock, OUTPUT);

  // for debugging
  Serial.begin(9600);

  //initially lock
  lock();
}

void loop() {
  int pressCount = 0;
  int pressedButton;

  int state0 = digitalRead(button0);
  int state1 = digitalRead(button1);
  int state2 = digitalRead(button2);
  int state3 = digitalRead(button3);

  if(state0 == HIGH && firstPress) {
    pressedButton = button0;
    pressCount++;
    lasttime = millis();

    Serial.print("button 0 pressed n");
  }
  if(state1 == HIGH && firstPress) {
    pressedButton = button1;
    pressCount++;
    lasttime = millis();
    Serial.print("button 1 pressed n");
  }
  if(state2 == HIGH && firstPress) {
    pressedButton = button2;
    pressCount++;
    lasttime = millis();
    Serial.print("button 2 pressed n");
  }
  if(state3 == HIGH && firstPress) {
    pressedButton = button3;
    pressCount++;
    lasttime = millis();
    Serial.print("button 3 pressed n");
  }

  if(digitalRead(buttonSet) == HIGH && lockState == 1){
    setNewCode();
  }

  // only allow one press at a time
  if(pressCount > 1){
    lock();
  }

  else if(pressCount == 1 && firstPress == 1 && millis() - lastpress > debounce) {
    Serial.print("lockState: ");
    Serial.println(lockState);
    switch(lockState){
    case 0: // locked
      addPress(pressedButton);

      //if four presses have happened then we've rolled over by now
      if(counter >= 4) {
        boolean state = testUnlock();
        if(state){
          unlock();
        }
        else {
          lock();
        }
      }
      break;
    case 1: // unlocked
      lock();
      break;
    case 2: // set new code
      addPress(pressedButton);
      //if four presses have happened then we've rolled over by now
      if(counter >= 4) {
        lock();
      }
      break;
    }

    firstPress = 0;
    lastpress = millis();
  }

  // reset the firstPress variable one all the buttons have been released
  if(state0 == LOW && state1 == LOW && state2 == LOW && state3 == LOW){
    firstPress = 1;
  }

  // timeout if the code has only been partially entered
  if(millis() - lasttime > timeout && lockState == 0 && counter > 0){
    Serial.print("timeout: ");
    Serial.print(millis()-lasttime);
    Serial.println(" ms");
    lasttime = millis();

    lock();
  }

  //  delay(100);
}

void addPress(int currentPress) {
  Serial.print("counter: ");
  Serial.println(counter,DEC);
  if(lockState == 0) {
    entry[counter] = currentPress;
  }
  else {
    code[counter] = currentPress;
  }
  counter++;

}

boolean testUnlock() {
  // compare the entry and code arrays
  for(int i=0;i<4;i++){
    if(code[i] != entry[i]){
      // only one mismatched entry will fail
      return 0;
    }
  }
  // if all have passed then the combination must be correct
  return 1;
}

void lock() {
  // turn off the unlock light (and flash the lock light
  digitalWrite(ledUnlock,LOW);
  blinkLed(ledLock);
  digitalWrite(ledLock, HIGH);

  lockState = 0;

  // clear the users input
  entry[4];

  // reset the counter
  counter = 0;

  Serial.print("locked n");
}

void unlock() {
  // turn on the unlock light, turn off the lock light
  digitalWrite(ledUnlock,HIGH);
  digitalWrite(ledLock, LOW);

  lockState = 1;

  // clear the user input
  entry[4];

  //reset the counter
  counter = 0;

  Serial.print("unlocked n");
}

void setNewCode() {
  Serial.println("Setting new code mode");

  // illuminate both lights
  digitalWrite(ledLock, HIGH);
  digitalWrite(ledUnlock, HIGH);
  lockState = 2;
}

void blinkLed(int led) {
  digitalWrite(led,LOW);
  delay(100);
  digitalWrite(led,HIGH);
  delay(200);
  digitalWrite(led,LOW);
}
Leave a Reply
You must be logged in to post a comment.